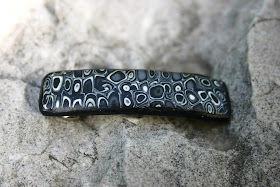
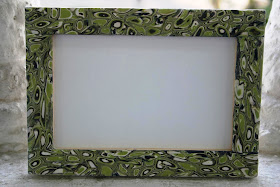
As I already wrote, I just love love love retro. So I'm here's to retro in polymer clay.
Unfortunately, the crazy mess on my work desk (it's so messy, I'm too embarrassed to even upload a picture of it...) is preventing me to open my polymer clay boxes and to shoot a nice tutorial for a retro cane, but I promise to do it sometime soon, when I find the time to take care of the mess. In the meanwhile, here's a written explanation on how to do it.
For this cane, you'll need polymer clay in 3-4 colors and a clay extruder. I highly recommend the one from Makin's, that unlike other clay extruders, doesn't require you to build your muscles before use...
Roll a snake, the same width as the clay extruder's, from each of the colors you chose.
Cut slices 1 cm each (0.4 inch).
Alternately join slices to create a new snake (i.e if you had 3 colors - red, blue, green - you'll want to make 3 snakes, one red, one blue, one green. Each snake you then cut into 1 cm slices, then make a new snake from one red slice, then one blue slice, then one green slice, then again one red slice and so on) same length as the clay extruder.
Load the snake into the clay extruder, choose a circle or square disk and turn. You'll get a long snake, that changes colors along the way.
Cut the snake into 9 equal parts and create a square out of the 9 parts (3X3 square). That's it - a retro cane.
From here you can take it to million different places - sheets, beads, jewelry and basically - whatever you want.
Here are some examples that I made -
 |
| stroller charm pin with Hamsa |
 |
| retro cane ring |
 |
| and another ring |
 |
| and a hair clip |
 |
| A pendant |
 | |
|

I love these! Thanks for showing me!
ReplyDeletedreaming-n-color.blogspot.com
7865091CB5
ReplyDeletekiralık hacker
hacker arıyorum
kiralık hacker
hacker arıyorum
belek