Sunday, January 16, 2011

Polymer Clay Retro

I really love polymer clay (aka Fimo). It's polymer clay that made me start crafting, around 4 years ago. Since then I've worked with many other materials, but polymer clay was definitely my first. So it's time to give polymer clay the respect it deserves, and to dedicate a first post to it (and I promise it's only the first of many).

As I already wrote, I just love love love retro. So I'm here's to retro in polymer clay.
Unfortunately, the crazy mess on my work desk (it's so messy, I'm too embarrassed to even upload a picture of it...) is preventing me to open my polymer clay boxes and to shoot a nice tutorial for a retro cane, but I promise to do it sometime soon, when I find the time to take care of the mess. In the meanwhile, here's a written explanation on how to do it.

For this cane, you'll need polymer clay in 3-4 colors and a clay extruder. I highly recommend the one from Makin's, that unlike other clay extruders, doesn't require you to build your muscles before use...

Roll  a snake, the same width as the clay extruder's,  from each of the colors you chose.

Cut slices 1 cm each (0.4 inch).

Alternately join slices to create a new snake (i.e if you had 3 colors - red, blue, green - you'll want to make 3 snakes, one red, one blue, one green. Each snake you then cut into 1 cm slices, then make a new snake from one red slice, then one blue slice, then one green slice, then again one red slice and so on) same length as the clay extruder.

Load the snake into the clay extruder, choose a circle or square disk and turn. You'll get a long snake, that changes colors along the way.

Cut the snake into 9 equal parts and create a square out of the 9 parts (3X3 square). That's it - a retro cane.

From here you can take it to million different places - sheets, beads, jewelry and basically - whatever you want.

Here are some examples that I made -


Polymer clay Stroller Charm Pin with Hamsa
stroller charm pin with Hamsa
Polymer clay retro cane ring
retro cane ring

Polymer clay retro cane ring
and another ring

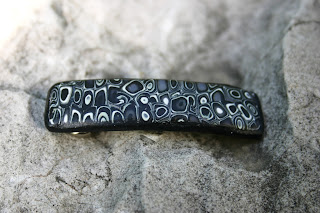
Polymer clay retro cane hair clip
and a hair clip

Polymer clay retro cane pendant
A pendant

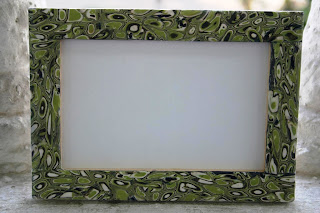
Polymer clay retro cane picture frame
picture frame

Sunday, January 2, 2011

Upgrading a Tank Top

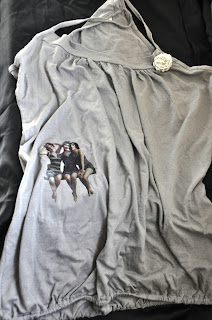
In the beginning of the summer I bought myself a simple tank top. I really liked its shape and color, but for some reason every time I wore it, I felt a bit pale. Something was missing. So after a lot of thinking, I finally decided what I want to do with it (and I don't care that summer is practically over and I won't be able to wear it this year). I dug in my pile of plastic bags waiting for recycling and found one with a beautiful picture of three women looking like they just emerged from the 50's. I cut the picture and decided to try and use a technique I've never tried before, only read about it a while ago. In this technique you use the iron to press plastic bags (the thicker kind, not the super simple ones) on clothes. So the minute I saw my dear husband ironing his shirts, I went to get the bag and tried it. I put the plastic bag picture on the tank top, then parchment paper on it and pressed hard with the iron.  If you're trying it, be careful not to move the iron and the picture. After pressing down for 30 seconds or so, I let it cool for 10 seconds and removed the parchment paper carefully, because the plastic sticks to it too. And the result:

Iron plastic bags on clothes


Then I added a crocheted flower. The instructions are in Hebrew only, but you can find lots of tutorials for crocheted flowers in English as well (roll down here for a similar crocheted rose).

Crochet flower


And here's the final result -

Upcycled tank top