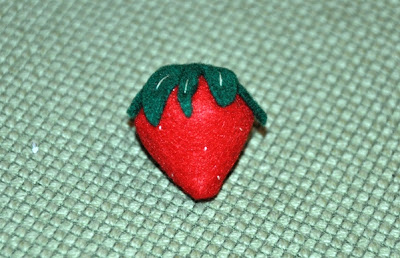
Finally! Even as my list of projects is only getting longer, I still managed to take some pics to explain how to make a felt strawberry, carrot and (peeled) banana.
For the strawberry you'll need:
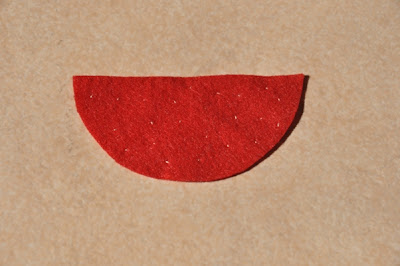
Red felt half squares, around 7 cm (2.75 ") in diameter.
Small pieces of green felt (for the leaves)
Yellow thread (cross stitch thread is better, but you can definitely use a sewing thread), red and green threads.
stuffing
Begin with the red felt.
Using the yellow thread, sew small dots all around it.
Fold in two, right side in, with straight side on straight side, and sew the straight sides together.
Turn over (right side out)
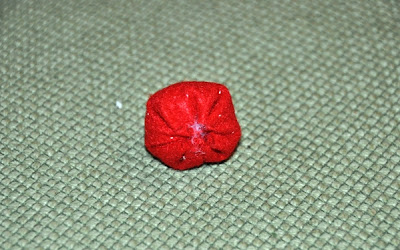
Use the red thread to sew the open side. Sew a simple, loose stitch. Pull the thread a bit, so that the opening will close a little. Stuff and pull all the way, to completely close it, then secure with a few stitches.
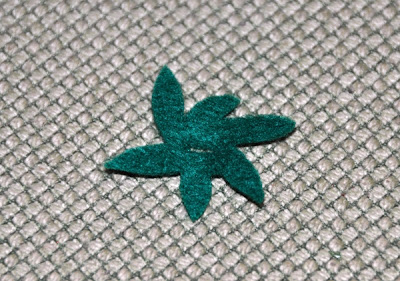
Cut a leaf out of the green felt
Sew the leaf to the top of the strawberry, and it's ready.
Now to the carrot. You'll need a piece of orange felt, in this shape:
And a piece of green felt for the leaves
Orange thread
Green Thread
Stuffing
Fold the felt lengthwise and sew. Leave the top open.
Turn over (it might be a bit difficult to get it all the way. I use a chopstick to get to the end), sew a simple, loose stitch (as you did with the strawberry) and pull a little. Stuff it (chopstick can help here too).
Pull all the way and sew.
Now the leaves. The leaves of the carrot are a bit different than the strawberry ones. If you'll grab a carrot from the refrigirator (come on, don't be lazy, go grab one!), you'll see that there are 2 parts - one is lying down and the other part is like a stem coming out from the top of the carrot (I'm sure it has a name, only I have no idea what it is...). To make this part, we'll cut a rectangle out of the green felt and cut lines across, but not all the way.
Now roll it and sew a stich or two in the bottom.
Cut a leaf, similar to the strawberry's one, and cut a small hole in the center.
Insert the rolled rectangle into this hole and sew a few stitches in the bottom.
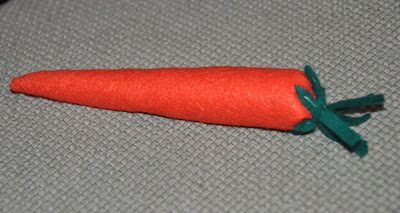
Sew it to the top of the carrot, and the carrot is ready as well!
And last but not least, the banana.
Yellow and cream felt
Yellow and cream threads
Stuffing
From the cream felt, cut a piece the length of an average banana, double the width.
Cut also 6 identical pieces, a bit longer then the first piece and about 3 quarters of the first piece width. 3 yellow and 3 cream.
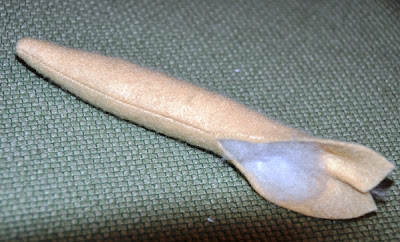
Fold the first, cream piece lengthwise and sew almost all the way. Leave a small opening for the stuffing. Turn over and stuff.
Use a
blind stitch to close it, and your banana is ready.
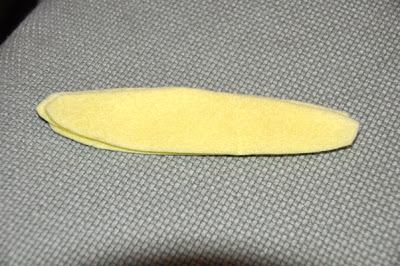
For the skin, place one of the 3 cream pieces on one of the 3 yellow pieces and use the yellow thread to sew all around. Do the same with the other 2 cream and 2 yellow pieces.
Take the first piece and sew one side of it to the side of the second piece, not all the way, just up to the middle. Keep sewing all the pieces until you get the skin. It's a bit complicated to explain, so take a look at the next picture, you need to sew according to the black lines, with the yellow felt inside and the cream outside:
That's it. Turn the skin over and put the banana inside (btw, ignore my skin. I accidently sewed it with the yellow felt out, so the stitches are visible. If you follow the instructions above, your stitched should be inside).

סופסוף הגעתי לזה. רשימת הפרויקטים שלי איכשהו לא מצטמצמת, אלא להפך – רק מתרחבת, אבל הצלחתי לצלם תמונות שמסבירות איך להכין תות שדה, גזר ובננה (מתקלפת) מלבד.
עבור התות תזדקקו ל: חצאי עיגולים של בד לבד אדום בקוטר של כ-7 ס”מ
חתיכות לבד ירוק קטנות (לעלים)
חוט צהוב (עדיף חוט ריקמה, אבל בהחלט אפשרי גם חוט תפירה), חוט אדום וחוט ירוק
מעט אקרילן למילוי

תופרים בעזרת החוט הצהוב נקודות על כל חצי העיגול (נכנסים בנקודה אחת ויוצאים הכי קרוב שאפשר)

מקפלים את חצי העיגול לשניים, כשהצד היפה בפנים – קו ישר על קו ישר וקימור על קימור ותופרים את שני הצדדים המקומרים זה לזה
הופכים (צד יפה בחוץ)

תופרים את הצד הפתוח בחוט האדום בתפר פשוט רפוי. מושכים מעט את החוט, כדי שהפתח ייסגר מעט, ממלאים באקרילן וסוגרים את הפתח לגמרי.


גוזרים ביד חופשית את הלבד הירוק, כך שתיווצר צורת עלה

תופרים את העלה לראש התות, והתות מוכן.

ל
גזר: חתיכת לבד כתומה בצורה כזו:

חתיכת לבד ירוק קטנה לעלים
חוט כתום
חוט ירוק (השתמשתי בחוט לבן כדי שיהיה קל יותר להבחין בו בתמונות)
אקרילן למילוי
מקפלים את הלבד הכתום קו ישר על קו ישר ותופרים.

הופכים (עלול להיות קצת קשה להפוך עד הקצה. אני משתמשת בצ’ופסטיקס, כדי להגיע עד הסוף), תופרים לאורך הפתח בתפר רפוי (כמו בתות) ומותחים מעט. ממלאים באקרילן (גם כאן אפשר להשתמש בצ’ופסטיקס כדי להגיע עם האקרילן עד הקצה).

מותחים את החוט וסוגרים.

עכשיו לעלים. העלים של הגזר קצת יותר מסובכים מהעלים של התות. אם תוציאו רגע גזר מהמקרר (נו, אל תתעצלו, תוציאו!), תראו שיש חלק של העלים ששוכב וחלק שהוא כמו מעין גבעול שיוצא מראש הגזר (בטח יש לו שם מקצועי, אבל אין לי מושג מהו…). כדי להכין את החלק הזה נגזור מלבן מהלבד הירוק ונגזור בו קווים לרוחב, אבל לא עד הסוף.

מגלגלים לרוחב ותופרים תפר או שניים כדי לחזק.

גוזרים עלה, דומה לזה של התות וגוזרים חור קטן במרכזו.

מכניסים את החלק המגולגל שהכנו לתוך החור של העלה ומחזקים בכמה תפרים.

תופרים את החלק לראש הגזר וגם הגזר מוכן.


ואחרונה חביבה להיום – בננה.
לבד בצבעים צהוב וקרם.
חוטים בצבע צהוב וקרם
אקרילן למילוי
גוזרים מהלבד בצבע קרם חתיכה בגודל של בננה ממוצעת, ברוחב כפול.

וגם 3 חתיכות זהות בצורתן, ארוכות מעט יותר מהחתיכה הראשונה וברוחב של בערך 3/4 מהחתיכה הראשונה כל אחת, 3 בצבע צהוב ו-3 בצבע קרם.

מקפלים את החתיכה הראשונה (בצבע קרם) לאורכה ותופרים בהיקף. משאירים חור קטן דרכו נמלא אקרילן. הופכים וממלאים באקרילן.


