Tuesday, May 28, 2013

The Story of the Three Bears

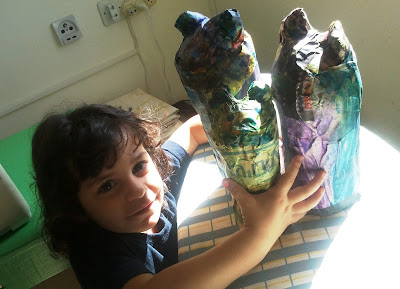
My kids love recycling. They've heard about it so many times in kindergarten, so now they won't let me throw away anything... Plastic bottles we throw to the recycling bins, of course, but this time we decided to give them new lives instead. Three bottles, in different sizes and shapes, turned happily into three bears that helped us tell the story of Goldilocks (who's not so goldi in our case, more like Brownilocks...) and the Three Bears.

Want to have them too? It's super easy (and fun!)

3 bottles, different sizes
newspaper
white glue
water
wallpaper paste
paint (acrylic, gouache)


using papier-mache to turn three bottles into three bears


Take three bottles, all in different sizes.
using papier-mache to turn three bottles into three bears


Cut away their top third
using papier-mache to turn three bottles into three bears

Now we'll make the glue that we'll use for the papier-mache:
Thoroughly mix 1 tbsp. wallpaper paste with 1 cup water. Add 1 tbsp. white glue, and let rest for 10-15 min.
using papier-mache to turn three bottles into three bears

Meanwhile cut newspaper strips...
using papier-mache to turn three bottles into three bears


Then start to glue the strips to the bottles, try to make it even (although when I work with the kids, I try to avoid helping them. I just explain what to do, and then let them try themselves).
using papier-mache to turn three bottles into three bears

using papier-mache to turn three bottles into three bears


Don't forget the ears!

using papier-mache to turn three bottles into three bears

Wait till it's completely dry (took us 24 hours or so on a hot sunny day), then paint and play!

using papier-mache to turn three bottles into three bears


------------------------------------------------------------------------------------------------------------------
Meet me at these parties: The Shabby Creek Cottage , Simply Sweet Home , Nap Time Crafters, Someday Crafts , Sugar Bee Crafts , Sun Scholars , Be Different Act Normal , The Girl Creative , Ginger Snap Crafts , Suburbs Mama , Liz Marie , Seven Alive , DIY Show off , Sugar and Dots , Sumo's Sweet Stuff , Today's Creative Blog , Domestically Speaking , Mad in Crafts , The Naptime Review , Natasha in Oz , Lil' Luna , No Time for Flash Cards , Skip to My Lou , Easy Living Mom , My Fashion Forward , Essentially Eclectic , Nanny to Mommy , Thrifty Decor Chick

Sunday, May 26, 2013

From Old IKEA Cupboard to Children Play Kitchen

I've been wanting a children play kitchen for a very long time. I think I wanted one even before I had kids. But not a lame, plastic one, but a nice wooden one. One that looks almost like the real thing.
When my mother in law says she dismantles the top part of her old wooden cupboard (that was bought, mind you, some 40 years ago, in a store you might have heard its name before - IKEA - when it was still something only known in Scandinavia), I knew I'm going to use it to finally build my kitchen.

upcycled cupboard into children play kitchen
This is the Before picture, Obviously...
I thought A LOT about how exactly to do it, drew a few sketches and even made a small ceramic model for inspiration.
ceramic model of play kitchen

ceramic model of play kitchen


ceramic model of play kitchen

And after I had the sketches and the model, and I knew what I wanted more or less, and decided on the colors (suitable for him and for her), it was time to start building it.
I found a piece of plywood on the street and used it for the back of the kitchen. I sawed the the original shelves and sides, to make the shape more convenient for play, I dismantled one door and sawed a window for the oven on the other and my husband helped saw a round hole for the sink, that is actually a metal bowl. Then I sanded and painted and got this...

upcycled cupboard into children play kitchen

The stove is made of old CDs covered with black tape...

upcycled cupboard into children play kitchen

To hide the mess, that I knew we're going to have, I sewed a cute little curtain for the lower shelves.

upcycled cupboard into children play kitchen

On the side I screwed together a cute knob, on which we hang the kids' aprons.

upcycled cupboard into children play kitchen

And of course, since I am me, after all, it's been over a year since I finished most of the work on this kitchen, and there are still some things to do:

The window of the oven is still open. It's time to buy Plexiglas...
The oven still needs a handle. Luckily I still didn't fix the Plexiglas, so the kids can open the oven at the opened window...
It still needs knobs for stove and oven.
And a tap...
A rod to hang above the stove / sink, for the kids to hang their kitchenware.
I already bought chalk paint, but still haven't painted the side of the kitchen, like I wanted to, for shopping list and messages.

In spite of all these unfinished parts, the kids love to play in this kitchen and even let mommy play along...


-------------------------------------------------------------------------------------------------------------------
Meet me at these parties: The Shabby Creek Cottage , Simply Sweet Home , Nap Time Crafters, Someday Crafts , Sugar Bee Crafts , Sun Scholars , Be Different Act Normal , The Girl Creative , Ginger Snap Crafts , Suburbs Mama , Liz Marie , Seven Alive , DIY Show off , Sugar and Dots , Sumo's Sweet Stuff , Today's Creative Blog , Domestically Speaking , Mad in Crafts , The Naptime Review , Natasha in Oz , Lil' Luna , No Time for Flash Cards , Skip to My Lou , Easy Living Mom , My Fashion Forward , Essentially Eclectic , Nanny to Mommy , Thrifty Decor Chick

Thursday, May 23, 2013

Chicken Nuggets with Hidden Vegetables

Oh, I remember the days when the kids ate everything I put on their plates... They even used to eat Weetabix with yogurt, a meal we used to call affectionately "food for horses". Once upon a time rice cakes used to be called cookied in our house.

Unfortunately, as they grew up, the variety of foods they were willing to eat drastically decreased. In addition, My kids refuse to coordinate their love of food. So he will take his toast with ketchup, Emmental cheese and no olives, and she will only eat it without ketchup and with mozzarella cheese and olives. He loves spaghetti bolognese, she likes plain pasta. He loves honey, she likes maple sauce. I guess you get the point... One of the few things both eat is junk food, like McDonald's chicken nuggets. Since we really try to avoid junk food, I decided to make chicken nuggets at home, and even make them as healthy as possible. Surprisingly, it worked for us very well. Hopefully it'll work for you as well :)

Chicken Nuggets with Hidden Vegetables


You'll need:
1kg (2.205 pound) boneless chicken breast
1 onion
1 peeled and diced potato
1 peeled and diced sweet potato
1 peeled and diced carrot
1 peeled and diced zucchini
2-3 garlic cloves, minced
2-3 eggs
3 tbsp. all purpose flour
salt and pepper
bread crumbs
oil

Chicken Nuggets with Hidden Vegetables
 
Grind together chicken and onion.
 
Chicken Nuggets with Hidden Vegetables
 
Cook in water the rest of the vegetables, except for the garlic. Cook until soft enough to mash it with a fork, but not too soft.
 
Chicken Nuggets with Hidden Vegetables
 
Add garlic, eggs, flour, salt and pepper.
Mix until everything looks blended together.

Put the bread crumbs in a small bowl. Make flat nuggets from the chicken mixture and coat with bread crumbs.

Chicken Nuggets with Hidden Vegetables


Heat the oil and fry a few minutes on each side, until they look golden brown.

Chicken Nuggets with Hidden Vegetables


You can also freeze the nuggets after coating in the bread crumbs and before frying. When you take it out of the freezer, just let sit for about half an hour before frying.

One last tip - for babies you can make them the same way, just don't coat with bread crumbs, and instead of frying, just put it in the oven (180 celsius / 356 fahrenheit) for 15 min. then flip to the other side for another 15 min.

Chicken Nuggets with Hidden Vegetables


Now serve your kids, cross your fingers and hope for the best!


Chicken Nuggets with Hidden Vegetables


***** Last week I finally set up a Facebook page for The Crafeteria. If you enjoy my blog, go visit me on FB and like me:). On this page you'll be able to get updates from the blog, as well as inspirations, pictures and other stuff that don't get to the blog. ****


Tuesday, May 21, 2013

A story about a boy, a girl, nature and popcorn...


Going again back in time, to Purim 2013. Purim is kind of like the Jewish Halloween. We celebrate it around February-March every year, and like Halloween, it also involves costumes and candies... So two weeks before Purim, I realized the holiday is almost here, and we still haven't decided on costumes for the kids (and I have 3 kids this year!).
So I asked the kids what do they want to be this year and Big-Boy said "nature"...
Me: "Nature???"
Big-boy: "Yes!"
Me (trying to cooperate): "Wow, that's a great idea... But how exactly are we going to do it?..."
Big-Boy: "What's the problem? We'll just glue some leaves and flowers"
Me: "..."
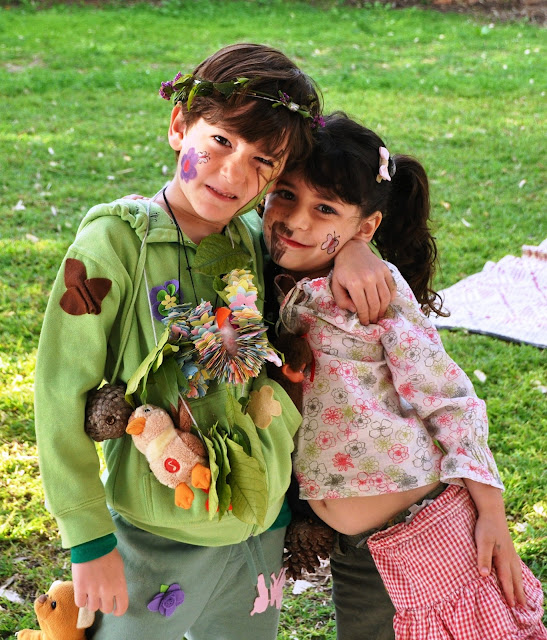
So it wasn't as difficult as I thought it would be. I used a hot glue gun to glue felt flowers and leaves to green clothes, then sewed lightly a few stuffed animals. Together with necklaces made of punched flowers and butterflies and floral head garland we created a look of a real nature son, although he still had to explain it to everyone (lead guesses - Jungle Boy, tree and forest).

Nature Costume
 
The girl decided to be a half-boy-half-girl. Perfect for her unique character. It actually was a very simple costume. I didn't sew or glue anything, just used safety pins to attach her clothes with the Big-Boy's. Then we just needed some hair and make-up job, and she was ready to go.
 
Half-boy-half-girl costume

Half-boy-half-girl costume
 
Half-boy-half-girl costume and nature costume
 
To the baby I made a costume I found on Pinterest

 
I used my hot glue gun to glue red felt stripes and letters on a white piece of felt. For the hat I glues (real) popcorn on a simple baby hat (Just imagine walking around a whole day with this popcorn smell right under your nose...). This is my version:
 
popcorn baby costume


Saturday, May 18, 2013

Back to Life (and A Dry Erase Board Tutorial)

Here I go again... It is so much easier to start things all over again than to persist with the old stuff...
After more than a year of net-silence, I'm going back to life, full speed. During this year so many things have changed - we moved, our big boy started first grade and we have a new addition to the family - a baby boy (who doesn't like sleeping like his mom does...). So I thought to myself - why not do some useful and fun things during maternity leave - I could finally finish setting up my Etsy store, write more, sew a bit, knit a bit. Ha-Ha! As if... I hardly found the time to breathe...Just now, when he soon will celebrate his first birthday, and we unpacked (almost) all the boxes, I can manage to do a bit more than laundry/dishes/cooking and go back to do the things I love.

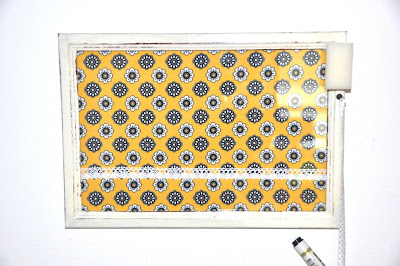
So I'm going to start with an old project, something I made for the kids' kindergarten teachers and assistants almost two years ago (talking about delay...). I made 4 dry earse boards, each is simply a piece of fabric in a frame with glass. When it's ready, just write your notes on the glass.

Dry Erase Board Tutorial


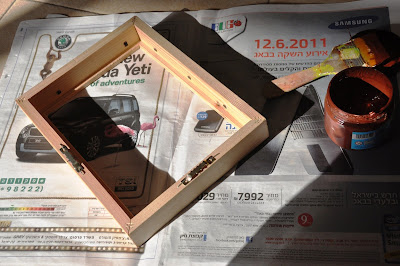
Find yourself a wooden frame (you can get super simple and cheap ones from IKEA or just use old frames. We're going to paint it to get a vintage look anyhow).
 
Dry Erase Board Tutorial
 

Paint your first layer in brown.

Dry Erase Board Tutorial
 
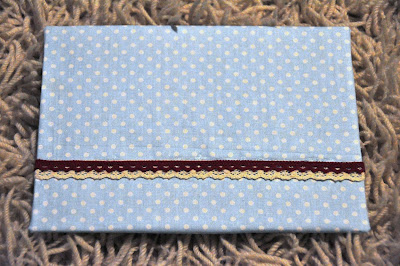
While we wait for the paint to dry, we'll prepare the backing. Using fabric adhesive attach a piece of fabric, slightly larger than the backing, to the frame backing. Try to choose a light color, otherwise it might be difficult to read what you write on the glass.
 
Dry Erase Board Tutorial
 
This is how it should look when you finish:
 
Dry Erase Board Tutorial
 

Now you can decorate with ribbons, lace or ricrac.

Dry Erase Board Tutorial

Dry Erase Board Tutorial

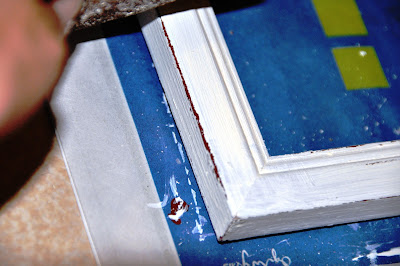
Now back to the frame. When the brown layer is dry, use a candle to rub all the corners and anywhere you want to expose the brown layer later.

Dry Erase Board Tutorial

Now paint 2-3 layers of white (or any other light color you choose) and let dry.

Dry Erase Board Tutorial

When it's dry, sand a bit on the spots where you want to expose the brown paint underneath.

Dry Erase Board Tutorial

This is how it should look:

Dry Erase Board Tutorial

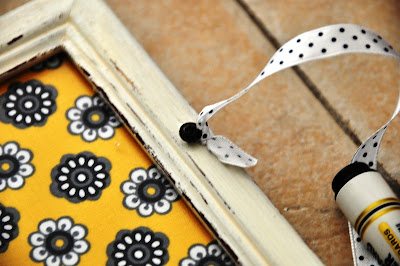
When paint is completely dry, apply polyurethane to protect the frame. Now we finish with the small details - place the glass and covered backing into the frame and add a marker. I tied a ribbon around the marker and attached it to the frame using a small screw.

Dry Erase Board

Dry Erase Board

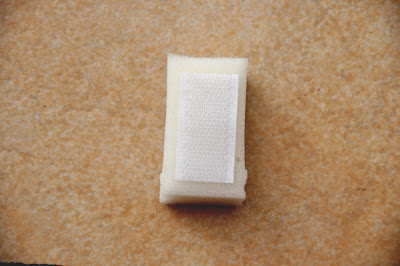
You can also add a small piece of sponge. Just glue a piece of Velcro onto the sponge and another one on the frame.

 
Dry Erase Board Tutorial
 
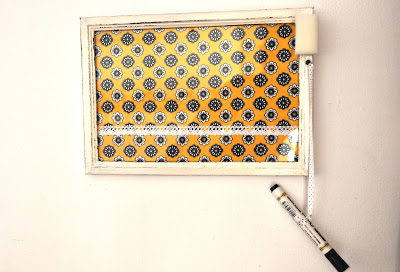
That's it, done!

Dry Erase Board Tutorial
 
Dry Erase Board Tutorial
 
Dry Erase Board Tutorial


These items from Amazon will help you get started...