After more than a year of net-silence, I'm going back to life, full speed. During this year so many things have changed - we moved, our big boy started first grade and we have a new addition to the family - a baby boy (who doesn't like sleeping like his mom does...). So I thought to myself - why not do some useful and fun things during maternity leave - I could finally finish setting up my Etsy store, write more, sew a bit, knit a bit. Ha-Ha! As if... I hardly found the time to breathe...Just now, when he soon will celebrate his first birthday, and we unpacked (almost) all the boxes, I can manage to do a bit more than laundry/dishes/cooking and go back to do the things I love.
So I'm going to start with an old project, something I made for the kids' kindergarten teachers and assistants almost two years ago (talking about delay...). I made 4 dry earse boards, each is simply a piece of fabric in a frame with glass. When it's ready, just write your notes on the glass.
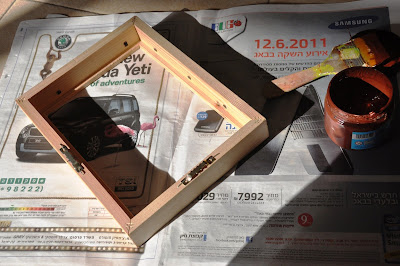
Find yourself a wooden frame (you can get super simple and cheap ones from IKEA or just use old frames. We're going to paint it to get a vintage look anyhow).
Paint your first layer in brown.
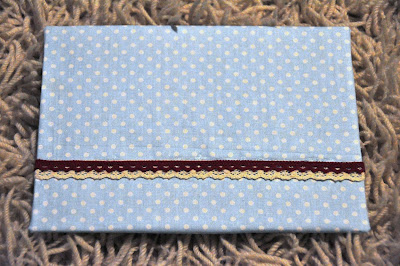
While we wait for the paint to dry, we'll prepare the backing. Using fabric adhesive attach a piece of fabric, slightly larger than the backing, to the frame backing. Try to choose a light color, otherwise it might be difficult to read what you write on the glass.
This is how it should look when you finish:
Now you can decorate with ribbons, lace or ricrac.
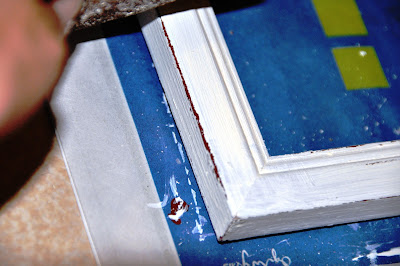
Now back to the frame. When the brown layer is dry, use a candle to rub all the corners and anywhere you want to expose the brown layer later.
Now paint 2-3 layers of white (or any other light color you choose) and let dry.
When it's dry, sand a bit on the spots where you want to expose the brown paint underneath.
This is how it should look:
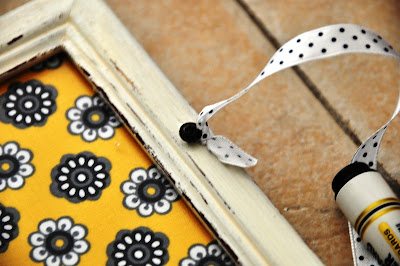
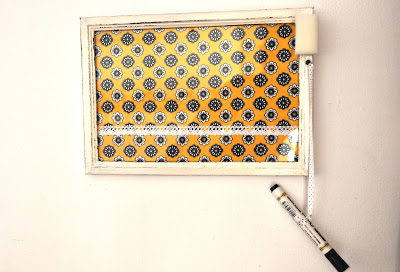
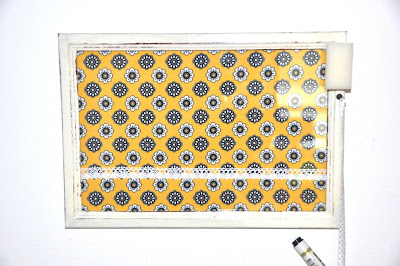
When paint is completely dry, apply polyurethane to protect the frame. Now we finish with the small details - place the glass and covered backing into the frame and add a marker. I tied a ribbon around the marker and attached it to the frame using a small screw.
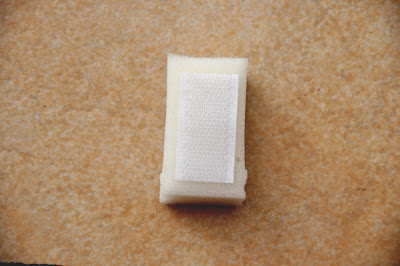
You can also add a small piece of sponge. Just glue a piece of Velcro onto the sponge and another one on the frame.
These items from Amazon will help you get started...








So cute and so clever :)
ReplyDeleteThanks Jenya!
DeleteSuper cute!My favorite is this with polka dots and flower sponge!!!
ReplyDeletecongrats
http://freestilcreatingbyvilly.blogspot.gr
Thanks Anastasia! Your blog looks great, too bad I can't read Bulgarian...
DeleteSo cute! Love the colors you chose. Thank you so much for linking up!I hope to see more from you on my next party.
ReplyDeleteThanks Rita!
DeleteThis is so adorable -- and I know the teacher's will appreciate a gift like this one. I am going to make them as Christmas presents this year.
ReplyDeleteGlad you like it, thanks for stopping by :)
Deletethanks for the post....my little girl is turning 3 and she loves the art easels with dry erase boards and chalkboards on them...this gave me an idea...I am going to make her the dry erase board one you have featured and use a similar method with chalk paint to do a chalk board and hang em on the wall with this project I should be able to make a set for home and work and save a ton of funds!!!!! plus I can personalize them...yay!!!!!
ReplyDeleteGreat idea! I also made some chalk boards for the kids, I'll share them soon, I'd love you to visit again to check out my ideas :)
DeleteThiss is awesome
ReplyDeleteCFA6FE9338
ReplyDeleteSkype Show
Telegram Görüntülü Show Grupları
Telegram Show Kanalı